Deutsche Bundesbahn Bogie Umbauwagen
Having built a rake of four six wheel Deutsche Bundesbahn Umbauwagen it seemed logical to build the equivalent bogie coach.
Like the six wheel coaches the bogie version came in the same three variants, 2nd class, composite 1st and 2nd class and a 2nd class with luggage compartment.
The bogie coaches were in service much longer than the six wheelers and were in service until after German unification with the last vehicles being withdrawn at the end of 1990.
They saw service across the entire West German network on branch, suburban and semi-fast services.
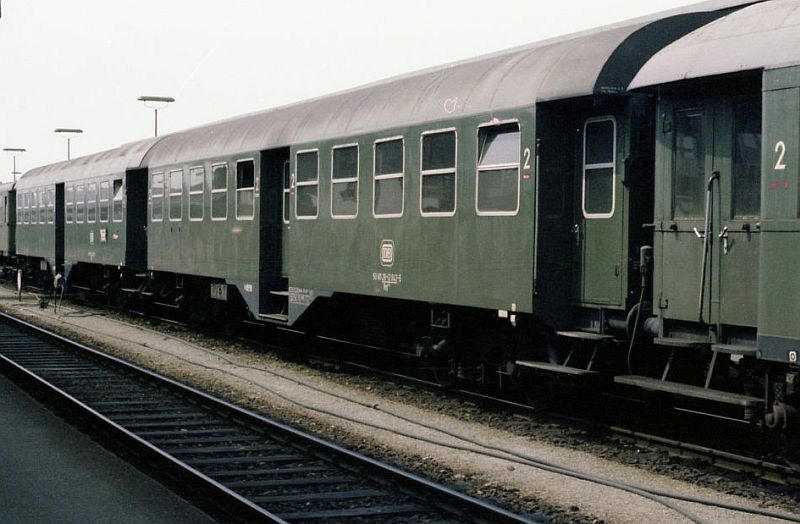
Byg 2nd class
This is a second class coach at Muhldorf in 1980.

As with the six wheel coaches construction was largely from cardboard. I rescaled drawings for the sides and used the ends of the six wheel 'pdf kits'. These are all the parts for a 2nd class with luggage compartment. The method of construction follows that of the six wheelers. Two sets of all parts are printed out, Then the window frames are cut out from one set of sides and glued with PVA on top of the window frame on the second sheet. The "glass" is then cut out leaving the raised frame and centre bar in place. Superglue is run along this centre bar to harden it.
Once all the windows are cut out construction proper can begin.
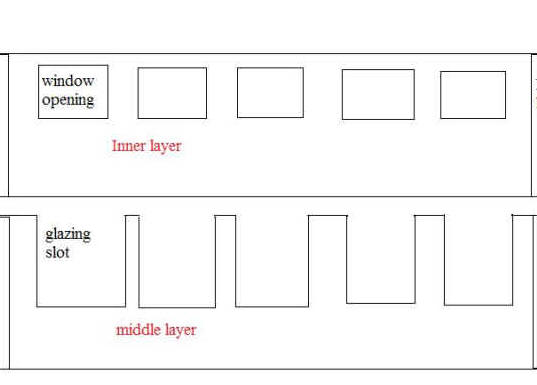
The glazing for the windows will be held in place by two layers of thin card glued inside the coach sides.
The first layer is like a comb into which the glazing will be slid. The second layer has window opening a little larger than the actual window frames.
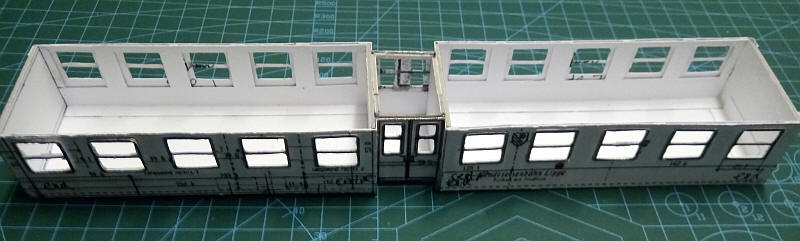
This is the basic body structure of the second class coach. The two sections with the seats have been glued to a base with the recessed centre doors in place. The coach end sections have yet to be added.
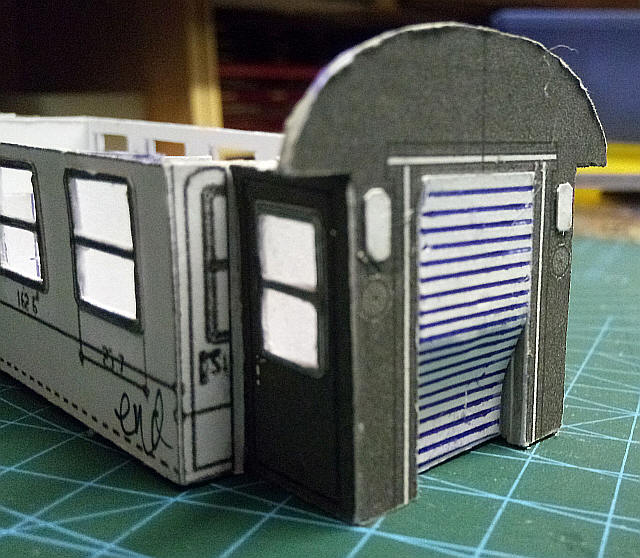
The ends of the coaches have this rather strange recessed door arrangement. I used the print outs from the pdf kit that I used for the six wheeled Umbauwagen - they are basically the same. The end and doors are a one piece cut out which has been strengthened with a lot of internal card strips before being glued to the end of the main body.
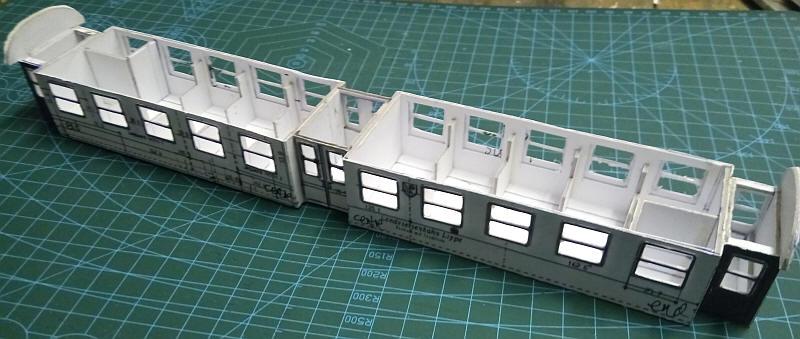
The end result is this giving a body that is 305 mm long - slightly longer and wider than my LMS 57' coaches. I suspect I may have some clearance problems when the finished vehicle runs onto Pendle Midland to get to the fiddle yard.....

The interior is now finished and painted. All seats and partitions were made from thick mounting board. The seat backs are in the form of an L shape as on the real thing there was a vertical partition to reduce draughts from open windows as in the photo below. The seats were built up from three layers of card about 5mm by 17mm wide capped with a 7mm by 17mm seat top.
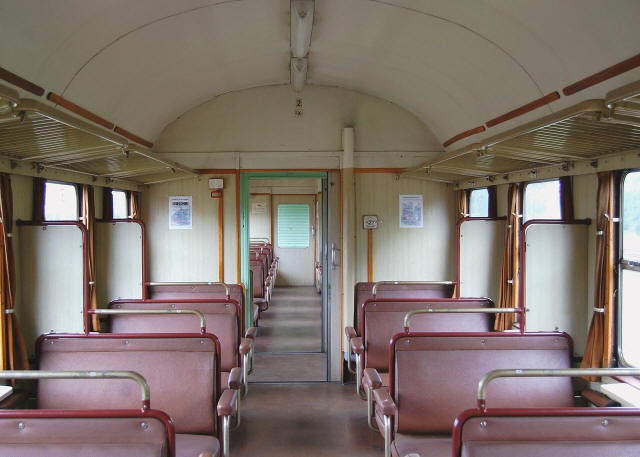
Unlike the 3 axle Umbauwagen which had rows of 2+3 seats the bogie Umbauwagen had 2+2 seating as they were intended for longer distance services.
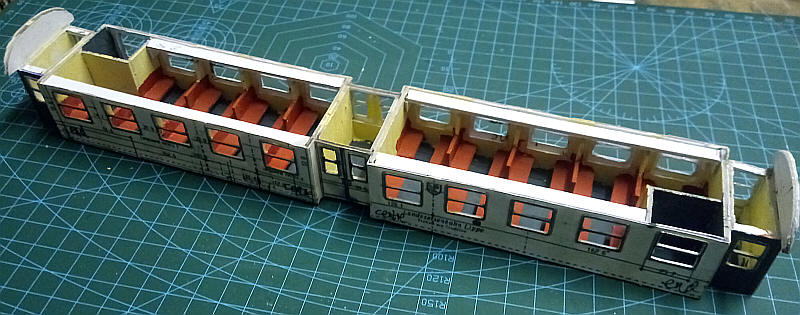
I've now added strengthening strips along the top edges of the sides above the windows. This is to ensure that the flimsy sides stay in line. The strips fortuitously replicate the longitudinal luggage racks on the real vehicle.

The roof unit has been completed. A length of mounting card 43mm wide by 295mm was cut to fit snuggly between the coach ends. Seven more layers of card of diminishing width were glued on top of this base to roughly match the curved ends of the roof.
Then a length of thin card was wrapped around the profile of the roof with each long side having a flap folded and secured under the roof base along one side with contact adhesive. A small amount of card was removed from the end of the flaps to clear the ends. Once I was satisfied with the fit the whole of the underside of the card was covered with a layer of two part epoxy resin. More resin was also applied to the layers of mounting card. The roof covering was then held in place whilst the epoxy set. Finally the card was painted with wood rot hardener.
The underframe and running gear
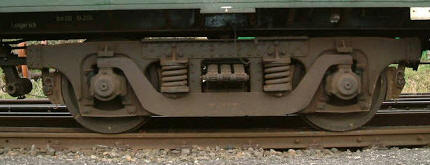
Moving on to the running gear and underframe I've started on the bogies. Many of the Umbauwagen used the pre-war "Schwanenhals" bogies so called because their frames resembled the neck of a swan.
The plan is to build a nickel silver and brass framework onto which are mounted layers of card to replicate the bogie side frames.
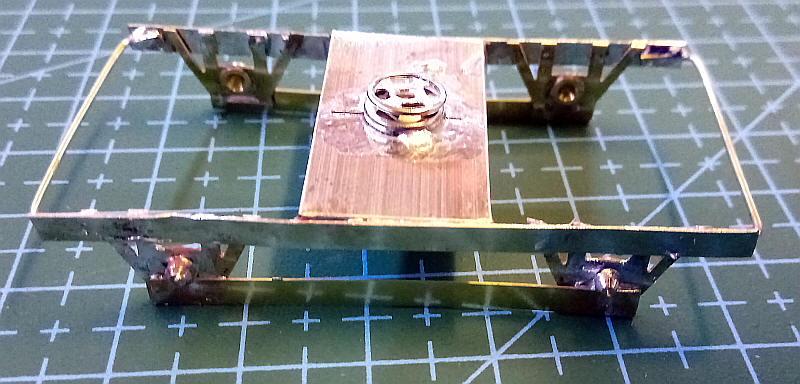
As I have a considerable number of the folding rocking W iron etchings etchings for British railway wagon underframes I decided to cut off the actual W-irons and solder them together at the correct distance using nickel silver strips. A simple card template was used to get the correct distance.
To make the bogie stretcher the tabs of rectangular top of the W iron etching were folded and soldered to the nickel silver strips making sure that this was equally spaced between the W irons.
After testing with wheels in place, 0.7mm wire was bent and soldered to the ends of the nickel silver strips to strengthen the bogie frame. Then a strip of brass was soldered in place directly under the bearings to give support for the cardboard sideframes. Finally a hole was drilled in the stretcher to accept the female part of the press studs which will be used as bogie pivots.

I've used card print outs of the bogie side frames with a base layer secured to the meatl frame with epoxy resin and then two layers of the swan's neck and springs added on front of this. At normal viewing distance on the alyout I feel these will be acceptable as I've used a simialr method on my freight rolling stock.

The bogies have been added to the underside of the coach.
The male half of the press stud was soldered to a piece of brass sheet glued to the coach floor - card was used to raise this to the correct height.
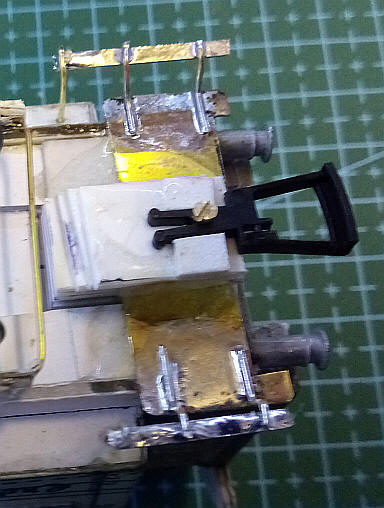
Longitudenal strips of mounting card 4mm wide were added inline with the recessed ends of the coach. Buffer beams were added and packing pieces of card were added behind the bufferbeam to act as a firm support for the cast buffers which were glued into holes drilled into the card.
At one end the coach has had a Hornby NEM coupling which is held in place with a 12BA bolt screwed into the floor. This gives a little sideways flexibility when travelling around curves. At the opposite end there is a KD coupling. This gives me the choice of running the bogie Umbauwagen with the six-wheelers, as often happend in real life.
 |
 |
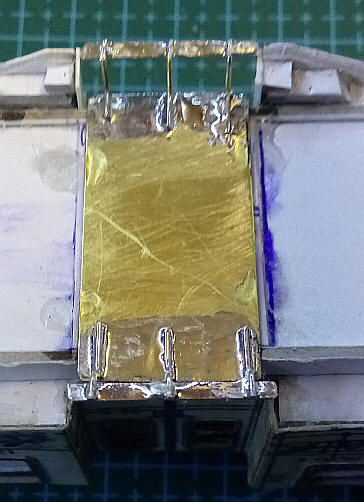
The steps at the ends and middle of the coach are fabricated from brass sheet and wire.
Pieces of brass are cut to size and glued to the undrside of the coach. These overlap the coach frame edges and also form the top step.
Lengths of brass wire are cut and soldered to the brass sheet to form the supports for the lower steps.
The nest stage is to add the strengthening pieces either side of the central doors. These are made from card with reinforcing strips behind to ensure the stay vertical.
The various underfloor battery and equipment boxes have been added from card as well as strengthening plates above the bogie centres. The handrails at the end of the coaches are from nickel silver. On the roof the ten ventilator covers are from square section plastic strips which have been shaped to be half round and tapered at the ends. Finally the end lights are simply card circles cut by a hole punch. Small pieces of plastic have been added near them by the doors.
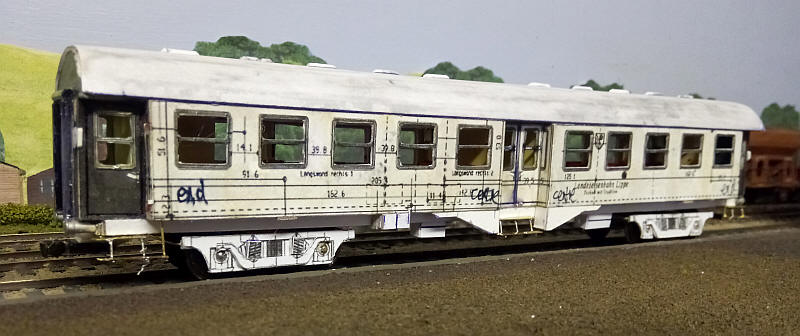
Construction is now complete apart from the addition of the electrical cable connection on the left hand end of each side.
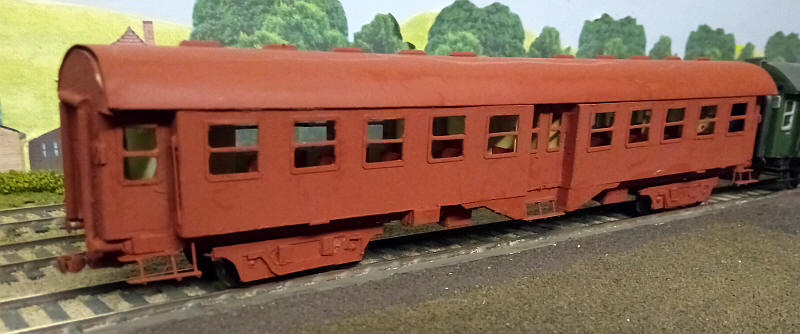
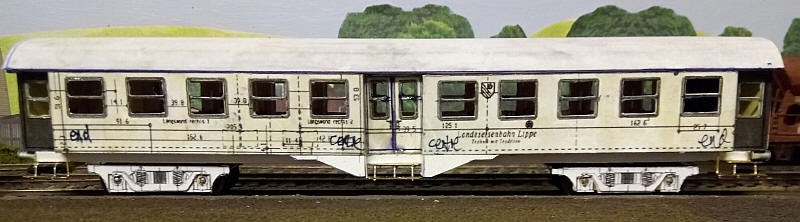
A coat of primer unifies everything and the model is ready for the first coats of green, grey and black paint. The gaps between the ends and the roof will be filled and painted once the model is finally assembled.
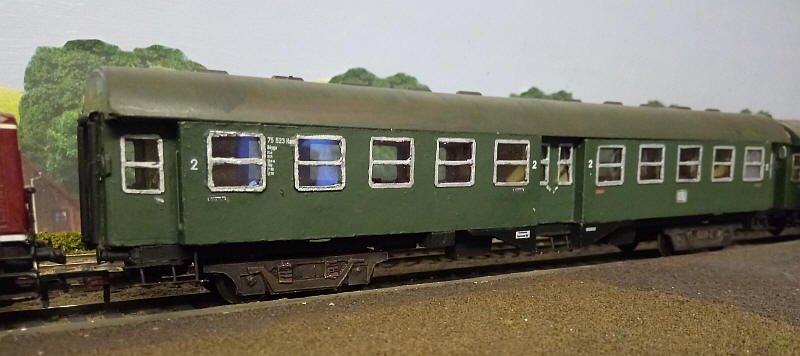
The model is now finished complete with transfers for Epoch 3 from Andreas Nothaft
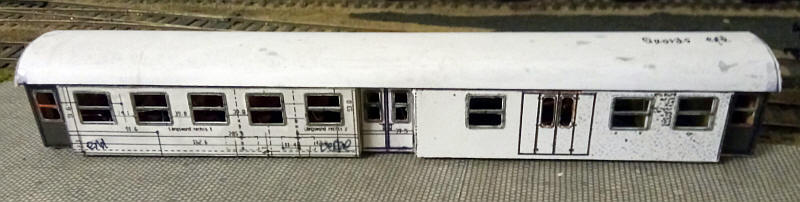
BDyg 2nd class with conductor and luggage section

The BDyg is similar to the full second class coach but with half the vehicle given over to an open space for luggage/post etc. and a small space for the conductor's office.
The roof is positioned loosely in place and after a little adjusting sits well.
The underframe and bogies for this model are exactly the same as for the 2nd class vehicle so I haven't duplicated construction of these.
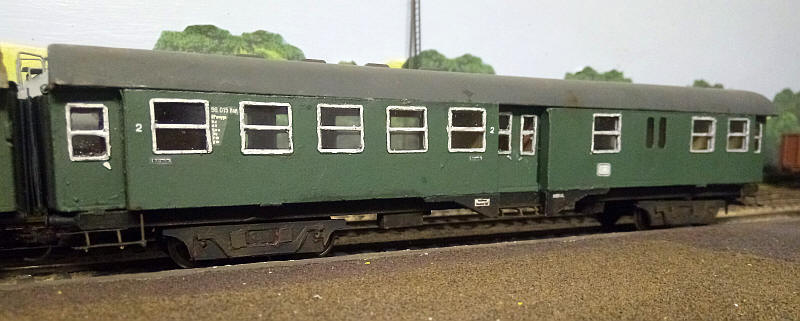
The completed model which together with the 2nd class model....
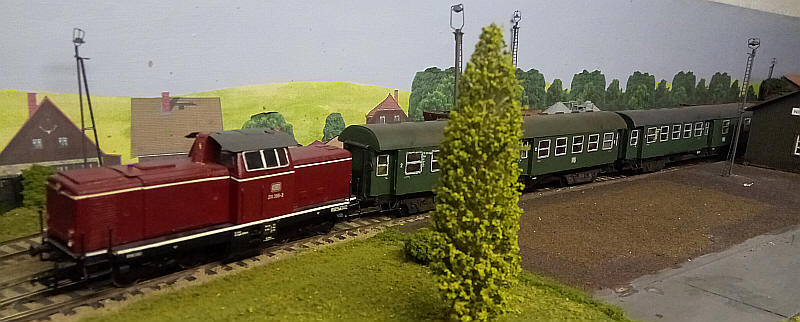
...forms a typical DB branch train of the 1970s/ 1980s period.
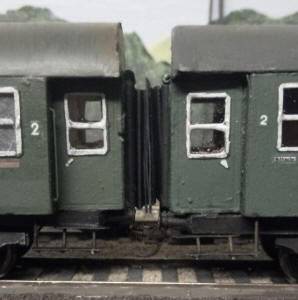
To improve the appearance of both the six wheel and bogie Umbauwagen I've fitted concertina corridor connection made out of thin card. The carriages are obviously too far apart but at least there is no daylight between them. The connections are fastened in place with blutack and have no difficulty running around the layout's sharp curves including propelling movements.